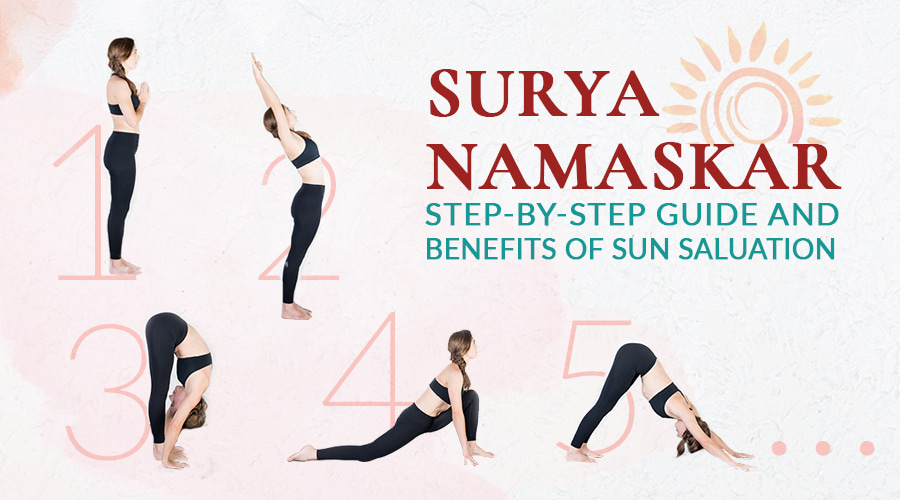

In the ancient language of Sanskrit, “Surya” refers to the sun, and the meaning of “Namaskar” is to salute or greet. Surya Namaskar is therefore a salutation to the sun. Commonly known today as Sun Salutations, Surya Namaskar is a series of 12 steps performed together in a flowing sequence that warms up the body and prepares it for yoga practice. For this reason, it’s usually the very first sequence taught in a yoga class. However, Surya Namaskar is not just a warm up. This sequence carries a rich history and provides whole-body benefits if practiced correctly.
Below, we explore Sun Salutation benefits for the mind and body, the origin and mythology surrounding it, as well as classical Surya Namaskar steps for your practice or yoga classes.
What Is the Meaning of Surya Namaskar Kriya?
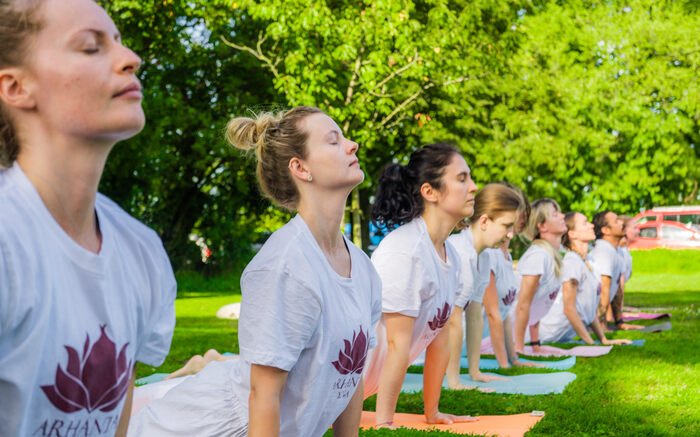
Kriyā is a Sanskrit term. It is derived from the Sanskrit root “kri,” meaning to do. Kriyā refers to an action or deed. In Hatha Yoga, the correct way to refer to Sun Salutations is to call it a kriyā.
Contrary to popular belief, Surya Namaskara is not a series of yoga poses (asanas). Instead, it's an action consisting of 12 connected steps, which include postures like forward bends, back extensions, lunges, and downward-facing dog. This makes it a dynamic flowing action rather than a static yoga pose.
The purpose of Sun Salutations is to warm up and invigorate the body for the following asana practice. Although it’s widely believed that Surya Namaskara Kriya should be practiced facing the sun, it is actually practiced away from the rising sun. Traditionally, you would greet the rising sun with a bow and a prayer, then turn your back to it to absorb its energy from behind.
Many practitioners notice that when the sequence is performed slowly and with control, it feels less like exercise and more like a structured way to build awareness, stability, and energy.
By doing this, we stimulate the back and spine and warm up the body for more challenging asanas. But there are more advantages to Sun Salutations than this.
In traditional yoga, this stimulation works best when the body is already purified. This is why practices like Shat Kriyas, classical yogic cleansing techniques, are recommended alongside asana and pranayama. They help remove internal blockages, allowing energy generated through practices like Surya Namaskara to flow more effectively.
Surya Namaskara Kriya is also associated with the solar plexus chakra, which helps raise solar energy in the body.
Surya Namaskar: What to Keep in Mind
Surya Namaskar is often practiced as a sequence of movements, but its effect depends less on the number of rounds and more on how you perform the sequence. The rhythm between breath and movement plays a central role in how the body responds to the practice.
- The sequence consists of 12 movements performed in a continuous flow
- Each movement is ideally coordinated with the breath to maintain rhythm and control
- Practicing slowly helps you build awareness and stability, while faster practice increases intensity
- The sequence is commonly used to prepare the body before deeper asana practice.
How to Do Surya Namaskar: Classical Vs. Modern
Classical Surya Namaskara (Hatha Yoga)
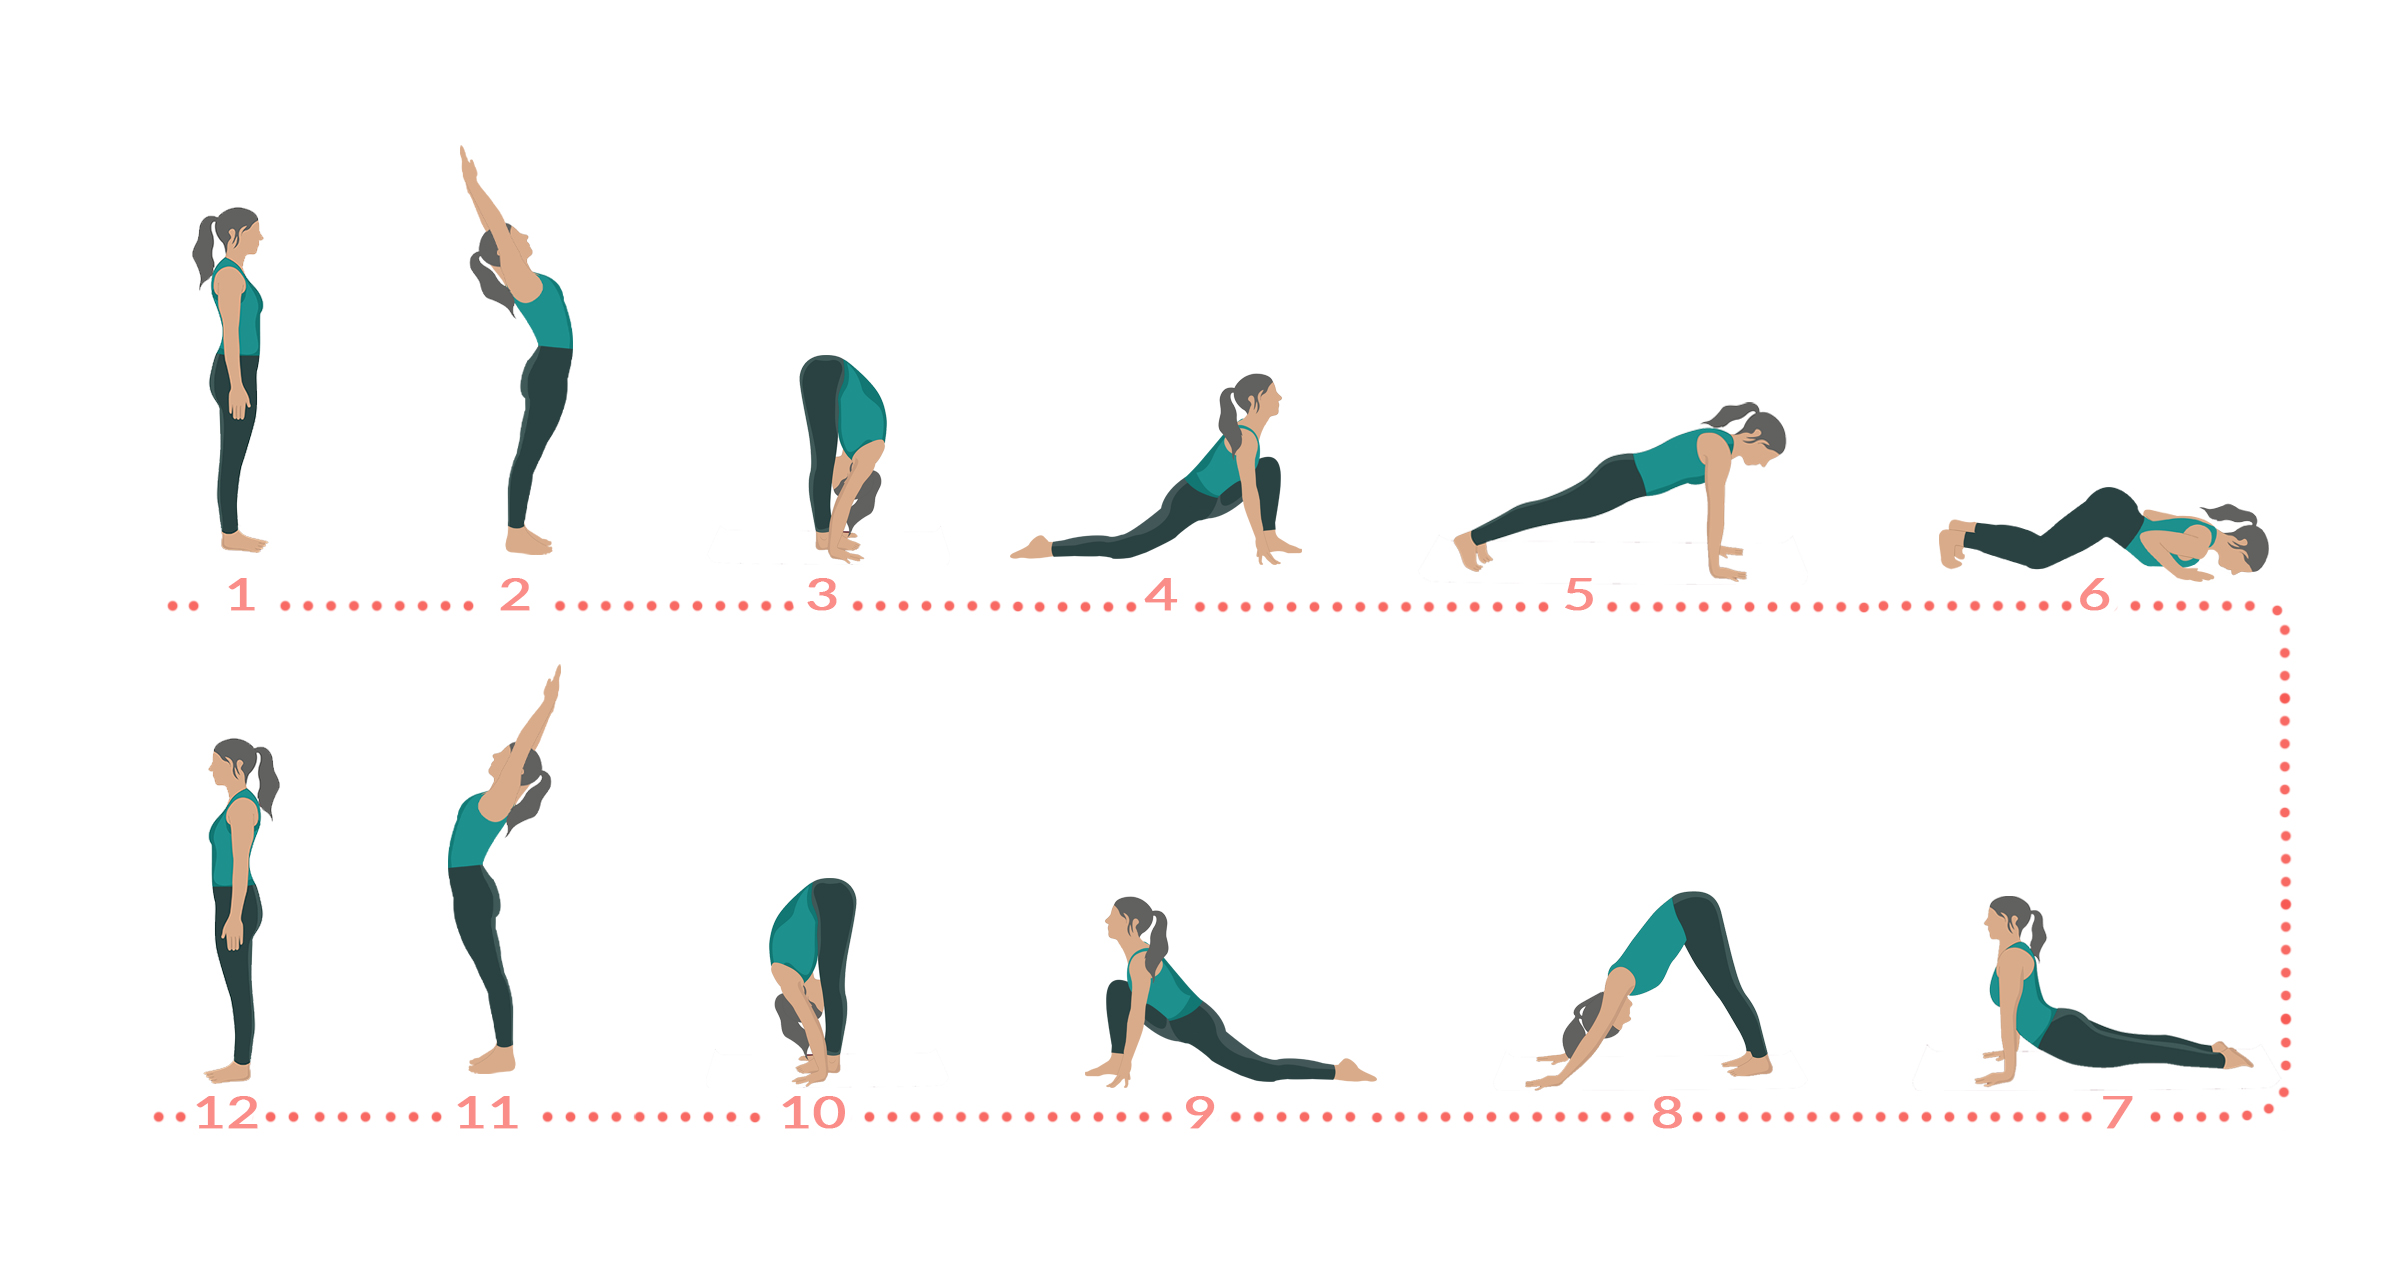
Modern Surya Namaskar (Ashtanga Vinyasa)
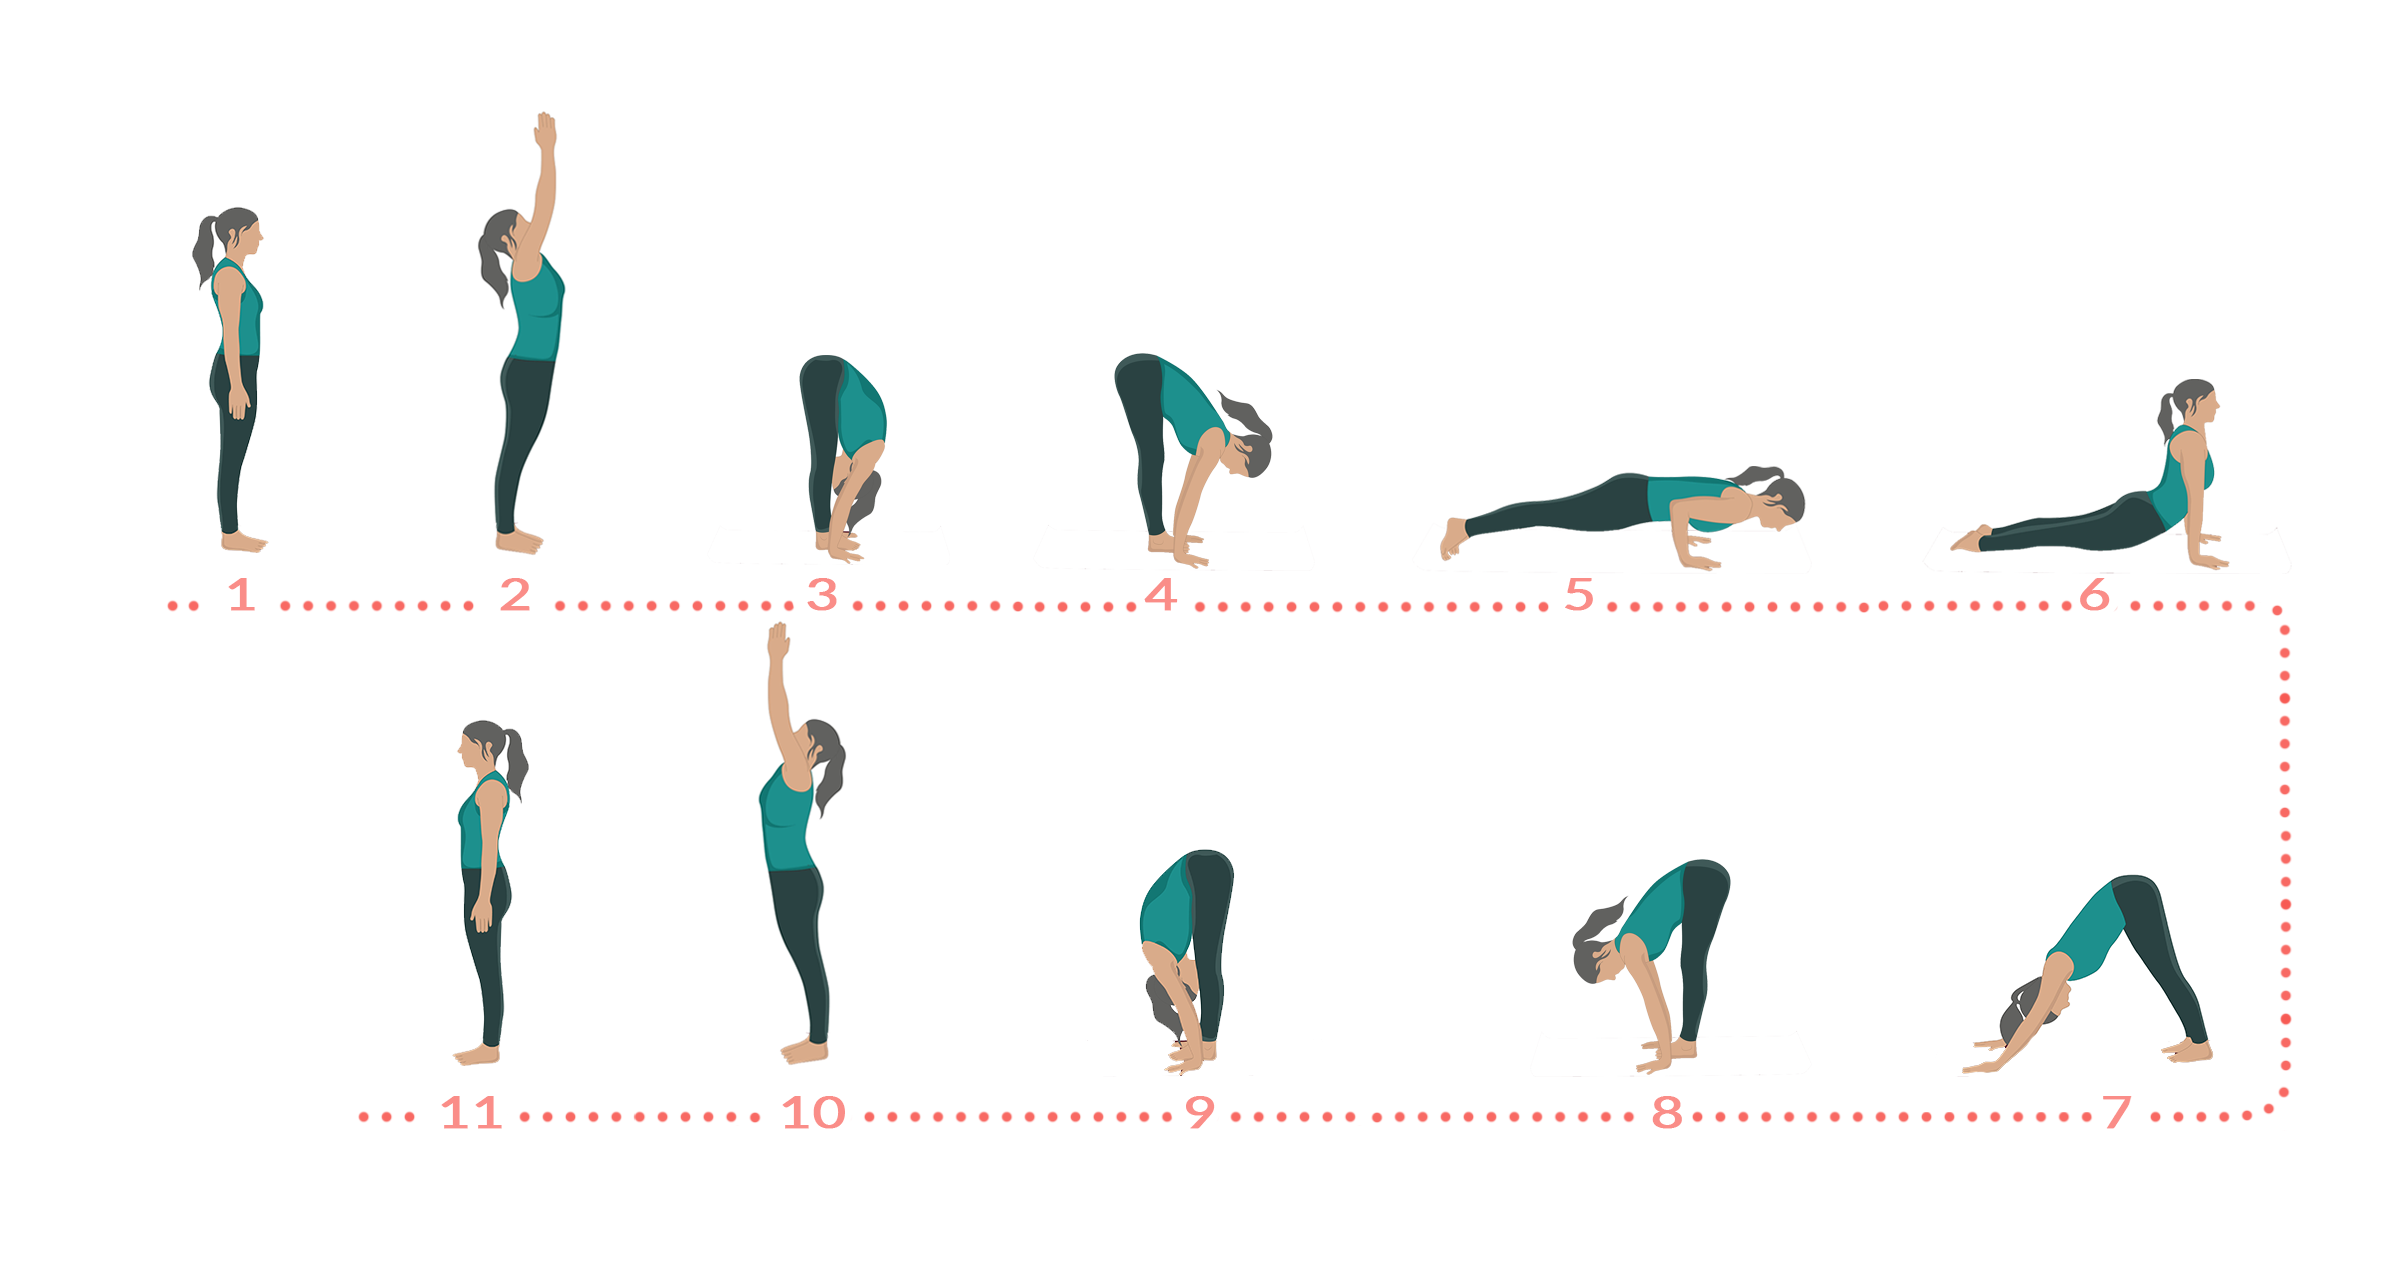
Classical vs Modern Surya Namaskar: What Are the Differences?
The classical positions of Surya Namaskar in Hatha Yoga tradition see the spine flow through a range of beneficial movements that allow for extension and flexion. These 12 steps truly aid in warming up and lubricating the spine for movement, while the modern version practiced in Ashtanga Vinyasa Yoga provides a cardiovascular workout which can be more challenging. Here are a few other key differences to keep in mind when practicing these two sequences.
Standing Forward Bend Position
- Classical (Hatha): Back is rounded and knees are soft, providing a gentle stretch along the spine.
- Modern (Ashtanga Vinyasa): Back is elongated and knees should be straight.
Stepping Back to Plank
- Classical: Move through a low lunge position with the chest lifted and pelvis pushing forward.
- Modern: Hop or quickly step back.
Lowering to the Mat
- Classical: Move the spine to gently stretch your thoracic and cervical spine.
- Modern: Lower flat down.
Downward-Facing Dog
- Classical: Keep the feet and hands in plank position and aim to bring your chest toward the knees.
- Modern: Shorten the stance to bring the majority of the stretch to the back of our legs and glutes.
How to Practice & Teach Surya Namaskar Step by Step
During Sun Salutations, you use hundreds of muscles, regulate the breathing, and center your thoughts. As a result, it is highly recommended to start every practice of yoga asana with Surya Namaskara. By doing so, you not only help your students warm up their spines, but it’s a great way to boost body's energy for practice. If you want to incorporate Surya Namaskar in your classes or personal practice, use these simple instructions for a well-rounded and fluid flow.
Classical Surya Namaskar
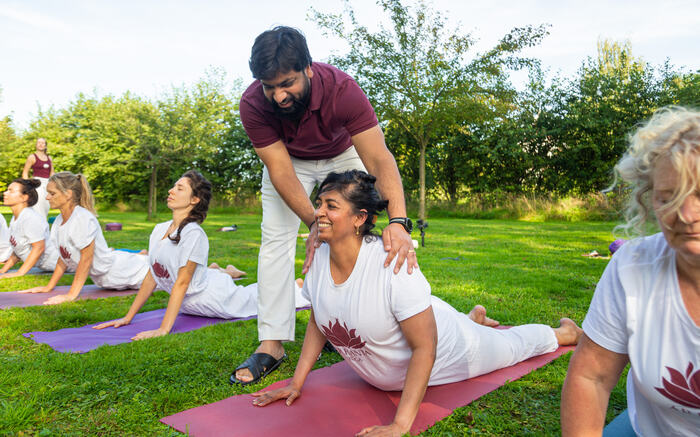
Step 1: Pranamasana (Prayer Pose)
Stand straight, with spine erect and shoulders relaxed. Your feet are hip-width apart. Your knees are straight but not hyper-extended and your arms are relaxed next to your body.
- Shoulders and elbows are relaxed.
- Knees are straight but relaxed.
- Back of your neck is long.
- Reach up with the crown of your head toward the ceiling.
Step 2: Hasta Uttanasana (Raised Arms Pose)
Breathe in and reach with your arms up and backward.
- Arms should be alongside your ears.
- Look upward; do not drop your head back.
- Knees are straight and hips are pushing slightly forward.
Step 3: Padahastasana (Standing Forward Fold)
Breathe out and bend forward, placing your palms on the floor, outside of your feet.
- If you cannot place your palms on the floor with your knees straight, you can bend your knees slightly.
- Reach with your nose toward your knees.
Step 4: Ashwa Sanchalanasana (Equestrian Pose)
Keeping your hands there, inhale, and bring your right leg back as far as possible.
- Place your right knee on the floor and point your right foot.
- Push the pelvis forward, without losing the 90-degree angle of your left knee.
- Open your chest, look diagonally upward while the palms remain on the floor.
Step 5: Phalakasana (Plank Pose)
Hold the breath and bring your left leg back .
- Your body is in a straight line from your head to your heels (push-up position).
Step 6: Ashtanga Namaskara (Eight-Point Salute)
Breathe out and drop your knees, chest, and forehead to the floor.
- Without moving your body backward, bring your chest down to the floor between your hands and then bring your forehead to the floor.
- Knees, chest, and forehead are touching the floor but the hips are off the floor.
Step 7: Bhujangasana (Cobra Pose)
Breathe in and scoop up.
- Open your chest and look up and back without dropping the head.
- Legs remain on the floor, feet are pointed.
- Do not move your hands as you come into this position.
- Elbows are slightly bent tucked in toward your body, and your shoulders are pushing down.
Step 8: Adho Mukha Svanasana (Downward-Facing Dog)
Breathe out, curl your toes and push the hips up.
- Without moving your hands or feet, push your hips toward the ceiling.
- Your hands are flat on the floor; heels can be slightly lifted off the floor.
- Head is between your arms. Now, look at your feet, trying to bring your chest to your knees. This pose is also known as the ‘Inverted V Pose’.
Step 9: Ashwa Sanchalanasana (Equestrian Pose)
Breathe in and bring the right foot forward in between your hands.
- Keep your fingers and toes in one line.
- Drop your left knee to the floor, point your left foot, and push your pelvis forward toward your right heel.
- Look diagonally upward—the same as in position 4.
Step 10: Padahastasana (Standing Forward Fold)
Breathe out, and keeping your hands where they are, curl the toes of your left foot and step your left foot forward, next to your right foot.
- Nose in between your knees, hands holding your ankles.
- Keep the knees straight.
Step 11: Hasta Uttanasana (Raised Arms Pose)
Breath in and reach with your hands out and upward.
- Arch backward—the same as in position 2.
Step 12: Pranamasana (Prayer Pose)
Bring your palms down in front of your chest, then return to the beginning position.
- Breathe out, palms together in front of your chest.
This completes half a round. Repeat to the left (left leg stepping first back and forward) to complete one full round of Sun Salutation. Perform 6 – 8 rounds, then rest in Corpse Pose.
Easy Classical Surya Namaskara
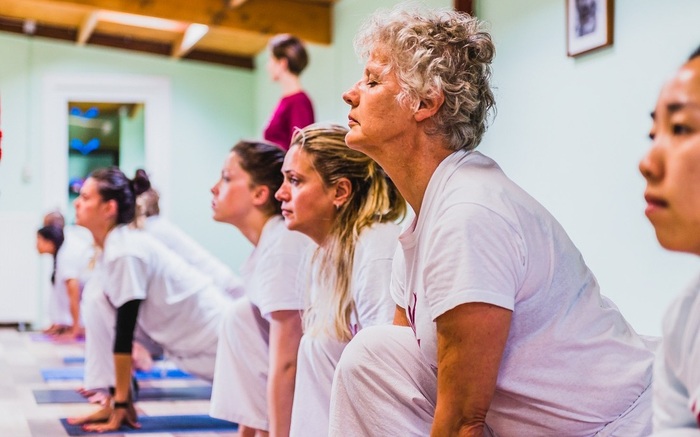
The beginner friendly variation of the Sun Salutation sequence can be done and applied by anyone with restricted movement, whether from injury or a chronic condition, old age, or pregnancy.
Step 1: Tadasana (Mountain Pose)
Stand straight, with your spine erect and shoulders relaxed.
- Your feet are shoulder-width apart.
- Your knees are straight but not hyper-extended.
- Your arms are relaxed next to your body.
Step 2: Pranamasana (Prayer Pose)
Breathe in and out, bringing your palms together in front of your chest. Shoulders and elbows are relaxed.
- Knees are straight but relaxed.
- Back of your neck is long.
- Reach up with the crown of your head toward the ceiling.
Step 3: Hasta Uttanasana (Raised Arms Pose)
Breathe in and reach your arms up toward the ceiling.
- Your arms are alongside your ears.
- Look straight forward, with the back of your neck elongated.
- Keep your spine’s natural curve.
- Do not arch your lower back or tuck your tailbone under.
Step 4: Padahastasana (Standing Forward Fold)
Breathe out, reach forward and out, placing your palms on the floor, in front of or in between your feet.
- Knees are slightly bent. Look in between your knees, with the crown of your head reaching toward the floor.
Step 5: Ashwa Sanchalanasana (Equestrian Pose)
Keep your hands there, breathe in and bring your right knee behind you on the floor.
- Your knee is resting below your pelvis on the floor.
- Look forward, opening your chest and keeping the back of your neck elongated.
Step 6: Tabletop Position (All Fours Pose)
Breathe out and bring your left knee behind you to the floor.
- Your knee is resting below your pelvis on the floor.
- Look to the floor, with the back of your neck elongated.
- Keep your arms perpendicular to the floor, with your hands directly under your shoulders and flat on the floor.
- Your knees are hip-width apart.
Step 7: Bitilasana (Cow Pose)
Breathe in, push your belly button toward the floor, raise your chin, and lift your tailbone.
- Your elbows are straight and shoulders are away from your ears.
Step 8: Marjariasana (Cat Pose)
Breathe out and round your spine toward the ceiling.
- Keep your hands and knees in their original positions.
- Release your head toward the floor, but avoid forcing your chin toward your chest.
Step 9: Ashwa Sanchalanasana (Equestrian Pose)
Breathe in and bring your right foot forward outside your right hand.
- Your left knee remains on the floor.
- Look forward, open your chest and keep the back of your neck elongated.
Step 10: Padahastasana (Standing Forward Fold)
Breathe out, keeping your hands where they are, and bring your left foot forward outside your left hand.
- Your knees are slightly bent.
- Look in between your knees, with the crown of your head reaching toward the floor.
Step 11: Hasta Uttanasana (Raised Arms Pose)
Breathe in and reach your hands forward and up to the ceiling.
- Your arms are alongside your ears.
- Look straight forward, with the back of your neck elongated.
- Keep your spine’s natural curve. Do not arch your lower back or tuck your tailbone under.
Step 12: Pranamasana (Prayer Pose)
Breathe out, bringing your hands in front of your chest, palms together.
This completes half a round. Repeat to the left (left leg stepping first back and forward) to complete one full round of Sun Salutation. Perform 4–8 rounds, then rest in Corpse Pose.
Watch & Learn: https://youtu.be/Fcq5DvfXIy8?si=OWvlmnaklgU23LvC
Practicing Surya Namaskar at Different Pace
Surya Namaskar is not always meant to be practiced at the same pace. The speed of the sequence changes how the body responds and what you gain from the practice.
- Slow pace
Practicing slowly allows you to coordinate movement with breath and maintain better control. This approach helps improve alignment and makes the sequence feel more stable and intentional. - Moderate pace
A steady rhythm creates a balanced practice. It allows the body to stay active without losing control, making it suitable for regular daily practice. - Faster pace
Moving more quickly increases intensity and builds heat in the body. However, it requires good coordination, as rushing can reduce the quality of movement.
Why Practice Surya Namaskar? Benefits of Sun Salutations
There are numerous reasons why you should never skip Sun Salutations. Firstly, Surya Namaskar steps are vital for warming up and allowing the body to “open” as it stretches, strengthens, and lengthens all muscle groups. This practice also stimulates prana (life force energy), helping to regulate our mental and physical faculties.
Today, numerous studies are emerging on the benefits of Sun Salutations and yoga for our mental and physical health. Here, we look at some of these benefits.
Physical Health Benefits
Each pace offers different benefits. A slowed pace helps increase body flexibility, while a medium pace builds muscle tone. Fast-paced rounds of Surya Namaskar are beneficial for your cardiovascular health and can aid in weight loss. Other physical Sun Salutation benefits include:
Improved Blood Circulation
Surya Namaskar helps improve blood circulation and strengthen heart function. It also enhances the resting cardiovascular parameters, such as systolic blood pressure, diastolic blood pressure, and pulse pressure.
Increased Oxygenation
During Sun Salutations, more alveoli of the lungs are expanded, stimulated and then cleansed. Alveoli are tiny, balloon-shaped air sacs that work as basic respiratory units. Their function is to move oxygen and carbon dioxide (CO2) molecules into and out of the bloodstream.
Through the rhythmic breathing of Sun Salutations, the oxygen content of the blood is increased. This improves oxygenation of the body, especially the heart and brain. The cardiac muscles also improve through this rhythmic breathing and movement.
Boosts Gut Health
Surya Namaskar benefits your digestive system and overall health through its sequence of poses. Each movement massages and stretches your internal organs while strengthening your muscles. This natural compression and release helps support your body's natural cleansing processes.
Read more: How Yoga Can Improve Digestion – 8 Yoga Poses for Better Digestion
Mental Health Benefits
The mindful movements of Surya Namaskar support your mental health in powerful ways. As you develop a consistent practice, you'll likely notice improved focus, growing confidence, and natural discipline. The combination of breath and movement also helps calm your nervous system, offering relief from anxiety, depression, and insomnia.
How Often Should You Practice Surya Namaskar?
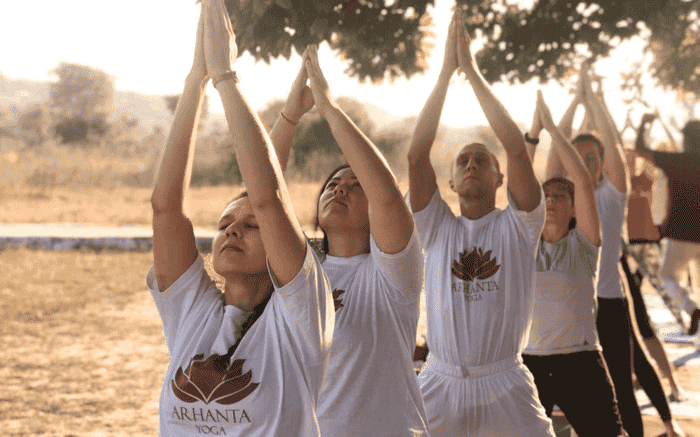
- Beginners can start with 3–5 rounds, focusing on coordination between breath and movement rather than speed
- Intermediate practitioners may practice 6–12 rounds, gradually increasing intensity while maintaining control
- The sequence is best practiced in the morning on an empty stomach, when the body is more receptive to movement
Remember to honor your body's limits. If you have:
- High blood pressure
- Hernia
- Heart conditions
- Wrist, shoulder, or lower back injuries
Consider practicing the gentler Easy Classical Surya Namaskara variation instead (see steps below). If you have spine or back issues, please check with your healthcare provider before starting your practice. Once cleared, work with a qualified yoga teacher who can guide you through appropriate modifications.
The key is also consistency over quantity. Focus on:
- Moving mindfully
- Matching breath to movement
- Building strength gradually
- Practicing with awareness
Also Try: Yoga for Lower Back Pain
Common Mistakes in Surya Namaskar
We often perceive Surya Namaskar as a repetitive sequence, but small inaccuracies in movement or breath can change how the body responds to the practice. Most mistakes happen not because the poses are difficult, but because the sequence is performed without enough attention.
- Moving faster than your breath can support
When you increase the pace without maintaining breath awareness, the sequence becomes mechanical and loses its natural rhythm. - Dropping into positions instead of transitioning with control
Transitions are as important as the poses themselves. Rushing into them can place unnecessary strain on the joints and quickly exhaust you. - Overarching the lower back in backbends
Trying to create depth without proper support often shifts pressure to the lower back rather than distributing it along the spine. - Locking the knees or elbows
Sometimes, you may unknowingly lock your elbows or keep your joints rigid, reducing the body’s ability to absorb movement and leading to unnecessary tension. - Treating the sequence as an exercise rather than a coordinated movement
When the focus is solely on completing rounds, the connection between breath and movement often gets lost, reducing the practice's overall effectiveness.
See: Guide to Yoga’s 5 Warrior Poses & How to Master the Perfect Form
Final Thought
Sun Salutation holds a special place in any practice, especially in Hatha Yoga. This flowing sequence creates a beautiful harmony between breath and movement, offering benefits that ripple through your body, mind, and energy systems. When practiced in the early morning hours, even a few rounds of Surya Namaskar can set a positive tone for your entire day.
If you’re interested in learning Classical Hatha Yoga in a more structured and traditional way, our 200-hour Yoga Teacher Training offers a step-by-step approach in an ashram-like environment.
Holistic Hatha Sequencing for Practitioners & Teachers
Get 17 primary asanas and key principles for a balanced practice sent straight to you.

Resources
- Jain, R. and Hauswirth-Jain, K., 2017. Hatha Yoga for Teachers and Practitioners: A Comprehensive Guide.
- A comparative study of slow and fast Surya namaskar on physiological function
- Ananda Balayogi Bhavanani, Kaviraja Udupa, Madanmohan, PN Ravindra .Int J Yoga. 2011 Jul-Dec; 4(2): 71–76. doi: 10.4103/0973-6131.85489 Effect of Pranayama and Suryanamaskar on Pulmonary Functions in Medical Students